Using the Driver’s Station and Logitech Controller
Now that you have Gizmo on your robot, and connected to peripherals such as motors, servos, and other sensors, it’s time to start controlling it remotely.
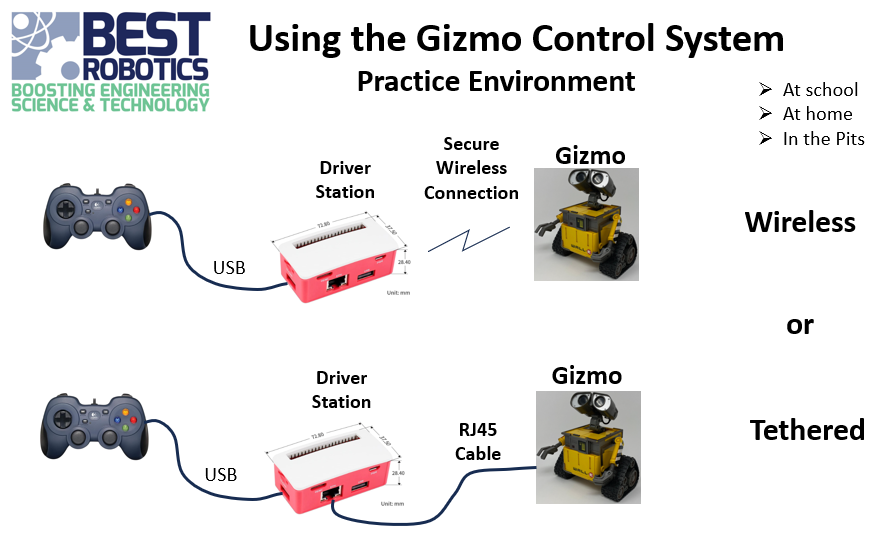
The Gizmo system uses a dedicated hardware appliance called a Driver’s Station to provide user interaction with the Gizmo via a Logitech F310 controller. While it is possible to use the Gizmo software and hardware with any computer, the Driver’s Station removes the requirement to use a dedicated computer for such interaction. The driver’s station is an embedded Linux system providing wireless and wired communications between the Logitech controller and the Gizmo. The driver’s station has its own dedicated USB power bank battery.
Normal use of the driver’s station is called Practice Mode. This is the default operation when you receive it.
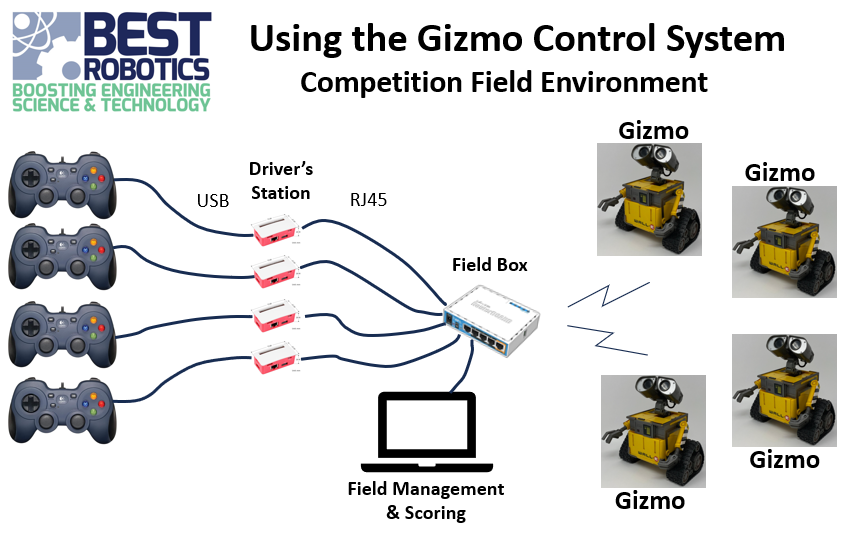
The gizmo’s system firmware is reconfigured during competition to match the settings for the field configuration being used; this reconfiguration will be accomplished during the robot compliance check. Teams should not need to perform any reconfiguration themselves. During competition use, the driver’s station will be plugged into an RG45 cable at the field and will rely on the Field Management System to provide wireless communication with the Gizmo.
Connecting the Driver’s Station
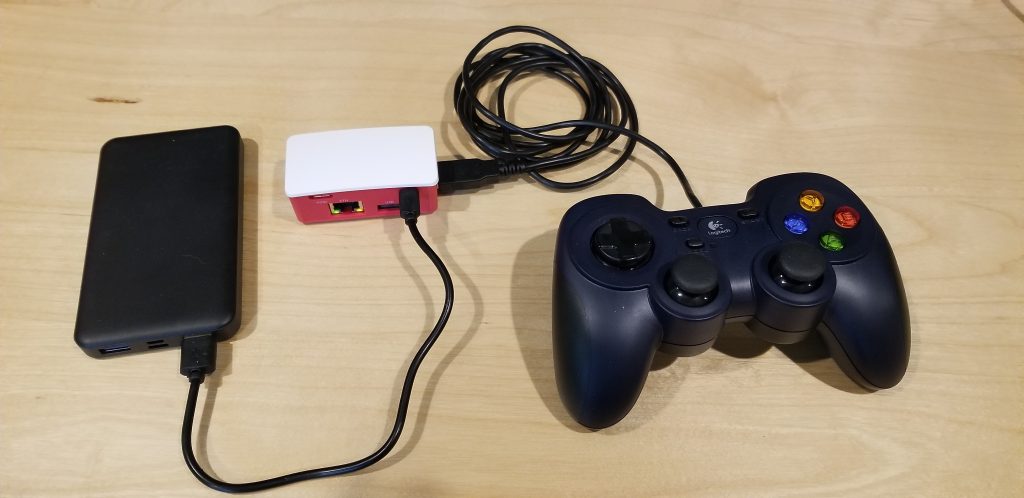
To connect and use the driver’s station, plug the USB cable from the Logitech F310 controller into an available USB port on the driver’s station. The Logitech controller and driver’s station are always used together. Except for storage, these two items will always remain connected. Now plug the battery into the USB B-micro port on the side of the driver’s station using the short USB cable. Note that a fully charged battery should last all day long. On many USB power bank batteries, an indicator will be provided showing the amount of charge left. When not in use you should power off the battery using the push-button switch on the battery.
Binding the Driver’s Station and the Gizmo
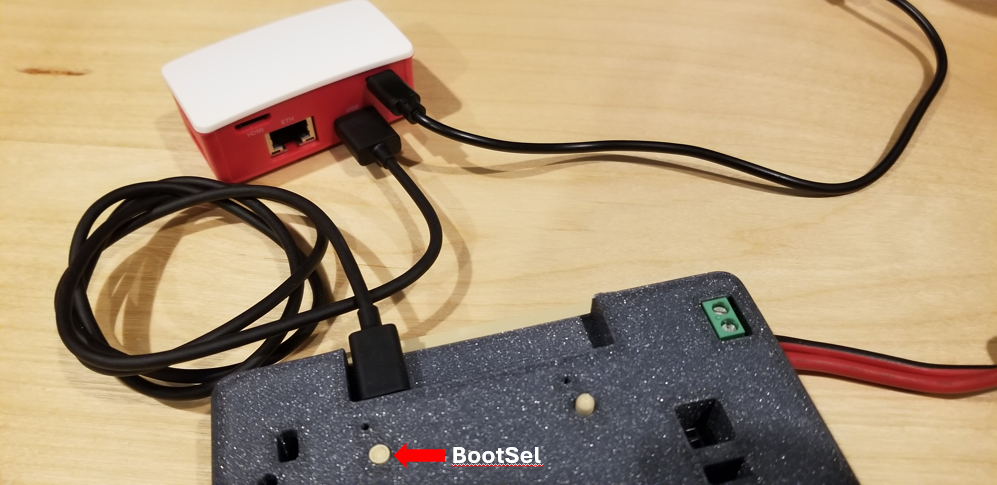
Before you can use the driver’s station to control the Gizmo on your robot, you must bind the two together to establish the proper communications link. Once this binding occurs, the driver’s station will be linked to that specific Gizmo. To perform the binding step, ensure that the joystick is plugged into a driver’s station USB port, then power on the driver’s station (i.e., battery attached and on). Wait about a minute to ensure the driver’s station has booted up completely. Now plug in the USB cable used for programming the Gizmo (USB A-to-micro) to an available USB port on the driver’s station. Plug the other end of the USB cable (B-micro) into the Gizmo system processor USB port. Connect the robot battery to the Gizmo and power-on the Gizmo.
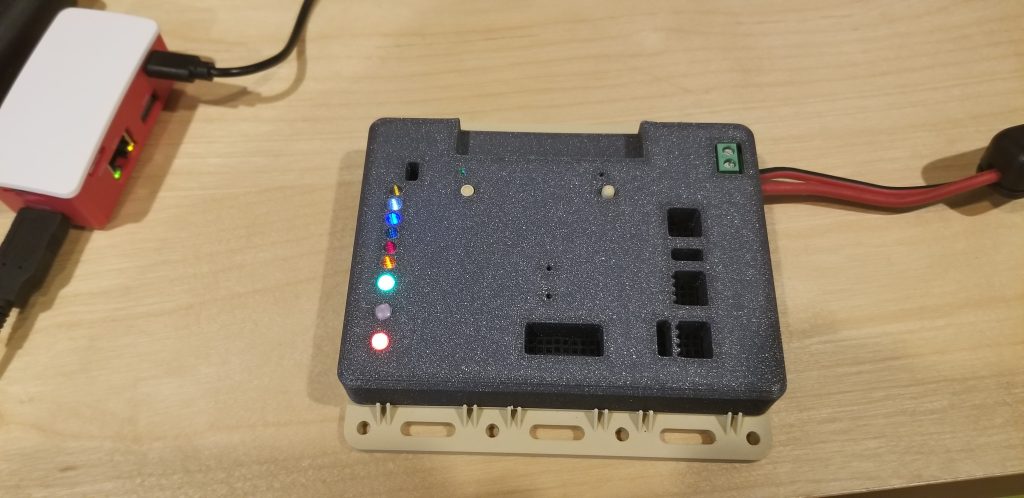
Now press and hold the BootSel button on Gizmo for 2 seconds until the two system status lights begin to flash red. Release the button immediately and the binding operation will begin automatically. When the Network system status light changes to green, the binding is complete. The Field system status light will flash white, indicating practice mode. Unplug the USB cable connecting the two devices.
Now cycle power on your Gizmo and wait for the wireless communications sync between the driver’s station and the Gizmo. This will take only a few seconds and the topmost Gizmo system status light will turn green. You are now able to control your robot wirelessly with the Logitech controller. The binding operation only needs to occur once; the two will remain bound on any subsequent use of this driver station and gizmo.
Using a Tether Cable
The Gizmo can be controlled through a direct wired interface from the driver’s station as well, known as tethered operation. A special RJ45 tether cable is provided for this purpose. Simply plug in the tether cable to the ETHERNET port on the driver’s station and the TETHER port on the Gizmo. The Gizmo topmost system status light should turn green indicating a connection is established.
The binding step is not necessary when using the tether cable connection.